Portable Provisions: Fuel Your Adventures with Dehydrated Treats
Summer activities require energy. Complex proteins and carbohydrates provide the most bang for your buck. Sure, you can grab a “food bar” of some sort, but with a little planning and preparation, you can make healthy snacks yourself to carry throughout the summer.
Summer is the time when, in a heady frenzy to enjoy the pleasures of our brief summers, we sometimes forget to eat. I mean, eventually we get hungry and grab something fast—just so we can get back outdoors. I remember teenage days on the farm when we’d come in S-T-A-R-V-I-N-G at 10 a.m. (having already been up and outside for hours) with the most intense urge to get food fast. Quick calories came in the form of a giant ice cream cone courtesy of the Schwann’s truck and his regular deliveries of 5-quart buckets of Neopolitan to the farm.
Ice cream meals may sound like a great idea—and don’t get me wrong, ice cream always sounds like a good idea during the summer. The practicality and health ramifications of ice cream for every meal are not such a great idea.
Summer activities require energy. Complex proteins and carbohydrates provide the most bang for your buck. Sure, you can grab a “food bar” of some sort, but with a little planning and preparation, you can make healthy snacks yourself to carry throughout the summer.
Dry It Out, Take It To Go
The food preparation and preservation method that serves us best here is dehydration. Dehydrating is the removal of moisture from food—simple as that. Methods and techniques can vary. What’s the difference between cooking and dehydrating? It’s all about temperature. Cooking is changing the state of the food through heat. Dehydration happens when foods are exposed to a low, dry heat (under 155 degrees). The low temperature is enough to evaporate moisture without breaking down the protein or carbohydrate structures when food is “cooked.”
The benefit of using dehydration to prepare complex carbohydrates is that the sugars stay complex. If you cook a piece of fruit, the carbohydrates break down into simple sugars that will give your body a quick, but short-lasting boost. A complex sugar is processed by your body more slowly, giving you a steady release of energy.
You can dehydrate in an oven (the preferred method for meat jerkies), or a specialized dehydrating machine. Dehydrators are readily available at most stores for $20 to $100 and beyond. (The fancier the machine, the more it costs!)
Nature’s Carriageable Candy
Dried fruits make wonderful snacks. These can be eaten solo or mixed with nuts for a personalized “trail mix.” To make, evenly slice fruits, then dip into a citrus solution to prevent browning. A citrus solution can be lemon or lime juice and water, and the standard ratio is one cup juice to one quart water.
A favorite tip: Use orange juice as your citrus solution and add an orange-y zing to everything. Lay the slices out on a parchment-lined cookie sheet for oven dehydration or on the tray of your dehydrator.
Think “slow and low” for the tempo. You want to allow enough time for the maximum evaporation of moisture. As the cook, you also get to decide how much time is enough. If you want a bit of chewiness, remove the items from the oven sooner. If you like crunchy, let them cook longer. Do know that dehydrated foods will still require some additional care. Keeping items in the fridge or freezer until you need them is the best way to go.
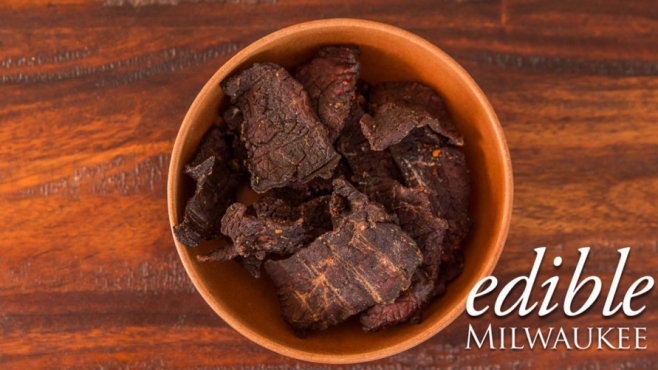
Portative Protein
Have you seen the price of jerky? It hovers around $18-$20 per pound! Jerky is a great, high-protein healthy snack. But at that price, jerky can be out of reach for many budgets. Doing it at home reduces the costs by two thirds.
The elements to making jerky are similar to drying fruit. The best cut to use is eye of round, sliced no larger than ¼ inch thick. Cut the meat into thin, even slices, marinate overnight (minimum of four hours, maximum of 48 hours) in a salty solution, and then place into your dehydrator. (Or on drying racks placed on a jelly roll pan in an oven set to 155 degrees.) Again, you, the cook, will determine the final texture of your jerky. You can leave in some moisture for a chewier jerky or evaporate it completely. Place in air-tight ziplock bag (or canning jar with lid or vacuum seal in bag) for storage.
The marinade is your chance to be creative. Having the sodium is critical, as the salt draws moisture out of the meat at the same time the low heat evaporates it. But after that, the flavors are up to you. See the sidebar for marinate recipes.
By the way—dried meat is one of the oldest food preservation techniques man has used. Northern Native Americans pulverized a combination of dried fruits, dried meat and additional fat to make pemmican. Pemmican was the lifeblood of the hunting tribes who passed it along to European colonizers. It’s enjoying a renaissance today among people who are following a Paleolithic-inspired diet.
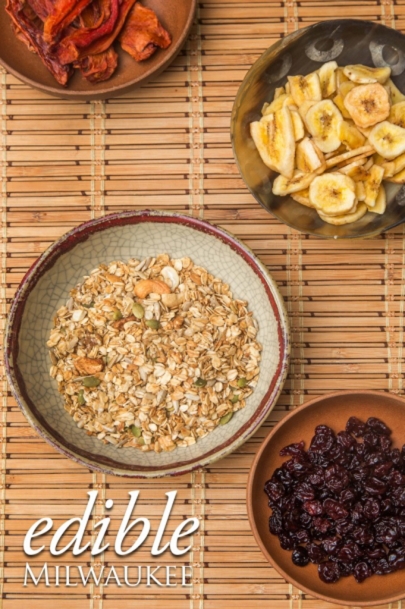
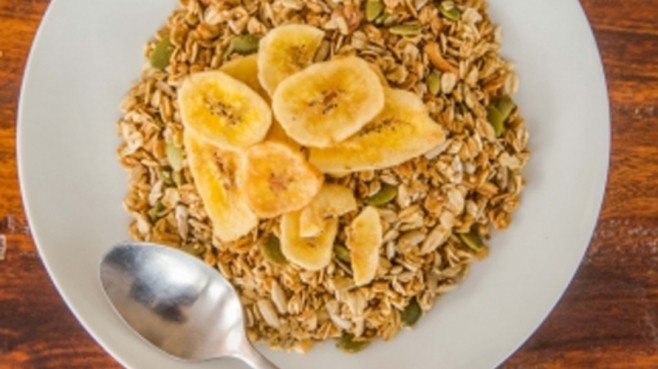
Grab Some Granola
Granola has the reputation of being a “fake healthy food” because most commercial brands have loads of added sugars. This modern take on granola boosts health benefits (for a slow energy burn) and ups the taste. Traditional granolas are baked; this version is fermented, then dehydrated. The lacto-fermentation process adds healthy bacterias to create probiotics. And by dehydrating instead of baking, those probiotics remain active.
At its core, granola is a mixture of grains and nuts. This method adds healthy coconut oil and a full-fat plain yogurt, which is your fermentation kickstarter. Simply mix your ingredients together, cover and place on your kitchen table or counter to ferment overnight. Spread the mixture on your dehydrating tray or prepared cookie sheet. Set your dehydrator at 110 degrees or your oven at its lowest temperature. Time needed will vary based on your methods.
The recipe we have is wonderfully flexible. You can substitute your favorite grains, nuts and spices—just keep the ratios the same. Fermented granola stores nicely in a large mason jar on the counter. You can freeze it, but know that freezing will kill the probiotics.
Whether your idea of a perfect summer is canoeing the Milwaukee River, sunbathing at Bradford, or enjoying the air-cooled beauty of our many art museums, treat yourself with snacks that will keep you fueled for all the fun activities.
Lacto-Fermented Granola
Jerky: 6 Ways